This great article is written by our valued CK Aero contributor Earl Haury
There’s an old saying that “A craftsman is only as good as his tools”. That’s certainly true for precision flying, and applies equally to all forms of modeling. One is not likely to win any model meet, or just enjoy a day of recreational flying, without frustrations if using poor equipment. Good quality airplanes don’t just happen, they’re built that way. It doesn’t matter much if they’re scratch built or an ARF, either must be built properly. This requires the use of the proper tools.
Knuckle skinner wrenches and bent screwdrivers just won’t get the job done. There are a number of “must have” hand tools for the field and the bench. Likewise, there are a number of “must have” for building and lots of the “nice to have” things.
For general field operation the tool kit should contain the proper tool for each fastener on one’s airplane. A good quality box end wrench that fits the prop nut, a glow plug wrench, small screwdrivers in straight blade and Phillips (JIS), as well as a very high quality set of “Allen” wrenches in both plain and ball end. If repairs require much more than these, it’s probably best to pack it up and make repairs in the comfort of the workshop.
The workshop is another story. You cannot have too many tools! Start with duplicating everything in the field box, it’s frustrating when the tool you need at the field is at home on the workbench. Obtain & organize tools in order of use, start with those always on the bench and go from there.
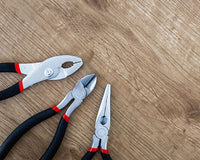
On my bench I have a short (6 inch) piece of two by four that’s drilled to accept a couple sizes / types of screwdrivers, a couple of small pliers and a diagonal cutter, a ball end hex driver for 4-40 socket head screws, an Exacto knife, a single edge razor blade, and a couple of pencils. A second wood block holds a set of ball end hex drivers in inch & metric along with a set of JIS screwdrivers. These are always on the bench and keep the most used tools within easy reach.
Note that most of the “Phillips” screw heads in modeling are actually “JIS” and a good set of JIS screwdrivers makes working with these fasteners much easier. Also, Olfa (available at Hobby Lobby) make a superb replacement for the small Exacto handle that stays tight & won’t roll off the bench.
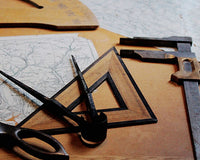
Measuring tools come next. A vernier dial caliper is mandatory. They measure anything from 0.001” to 6” in 0.001” resolution, outside, inside, or depth – a digital readout in both inch and metric is really handy. Stainless steel scales (rulers) in 6 inch to 18-inch lengths handle almost everything else and measure to 1/64 inch. A three and a four-foot long aluminum “yard stick” and a 10-ft. steel tape will handle the rest. Small machinists’ squares, 4 to 6 inches, handle most perpendicular angles and a large carpenters square will handle the rest. All but the tape serve double duty as various length straight edges for marking and cutting.
Then drilling tools. It seems as though a large part of the building process is drilling holes. A variable speed reversible hand drill with 0 to 3/8” capacity is a necessity. (Check out the Sioux or Milwaukee angle drill for the most convenient.) A bench model drill press with ½” capacity minimum is nearly as important. Opt for a Jacobs chuck on all drills to save frustration and provide accuracy. Of course there must be drill bits. The most useful is the numerical set with a range from #1 to #60. These will handle all small holes needed in models and include the proper tap and clearance sizes for all popular modeling fasteners. For holes in balsa, up to ½”, a variety of pieces of sharpened brass tubing works best. A descending order of other bits to have include a metric set, a fractional set, and a Forstner set. Titanium Nitride is nice but high-speed steel bits will last for years (if you place them back in the index after using). A few carbide (expensive) bits in popular sizes are worth it for drilling carbon fiber plates. For boring holes in composites (fiberglass fuselages, etc.), a Dremel tool and assortment of grinding stones (not steel burrs) is the ticket.
A really super cordless power driver that’s very controllable for driving screws, drilling small holes (1/4” max), and driving small taps, is the Bosch PS20. It’s small, powerful, and uses a Lithium battery – so it’s always ready and has become my favorite.
Of course, we cut all sorts of wood parts and need a means to handle this efficiently. When I started modeling I used a single edge razor blade and a coping saw. There are better ways! The tried and true Xacto type handle and #11 blade is a standard bench item and the long #26 blade works well for whittling balsa. For heavier cutting a small band saw is hard to beat. A 10” saw will handle most cuts, use a ½” blade for straight cuts and a ¼” blade for curves. A scroll saw is popular and can handle internal cuts. Given the choice of only one, go for the bandsaw and use a coping saw for the internals. It’s best to have both the bandsaw and scroll saw. Round out the wood cutting tools with a small modeling plane for rough trimming balsa.
Cutting metal and / or composites is best done with a Dremel using a cutoff wheel. Having tried most of the “trick” Dremel cutting tools, I prefer the thin 1” wheel for cutting bolts, music wire, and carbon fiber plate. I rough out CF parts by cutting straight lines, then finish on the disc sander. Eye protection and a dusk mask is mandatory here!
Then there’s the sanding. A bench mounted disc sander makes it easy to finish parts to a professional edge. Bigger is better, with 6-inch diameter being about the minimum. A variety of sanding blocks is mandatory. The “block” can be wood, aluminum T or box, or commercial blocks. You can’t have too many sizes and grits, 80 grit to 400 grit range works well. Use aluminum oxide cloth back for the 80 grit and standard automotive finishing wet/dry for the rest. I usually use contact cement to attach the sandpaper. The ½” diameter drum sander for the Dremel is very useful, and larger sanding drums for the drill press are handy also. With any sanding, and especially of composites, a dust mask is necessary. A dust collection system is a really good investment also.
There’s really no limit to tools. A small and / or large lathe is nice for making all sorts of parts that just aren’t available, as is an end mill. A small jointer is great for cleaning up edges of balsa sheets and a small, high quality, table saw (Microlux) is the ticket for cutting balsa into small strips. Digital levels are the key for accurate alignment along with a fuselage jig and wing vee blocks. A wide variety of small hand tools, clamps, and even mirrors (to go with the smoke incorporated into some designs) make building and maintaining your favorite airplane more enjoyable.
Just remember that the only hobby in the world is spending money, everything else is just detail!


